Producing Reports

Reports are an excellent way to manage large groups of thoughts in your Brain.
To open a brain's Report area, click the View menu then click the Report command. You may also click on the Right Panel button next to the search box. The report pane is resizable.
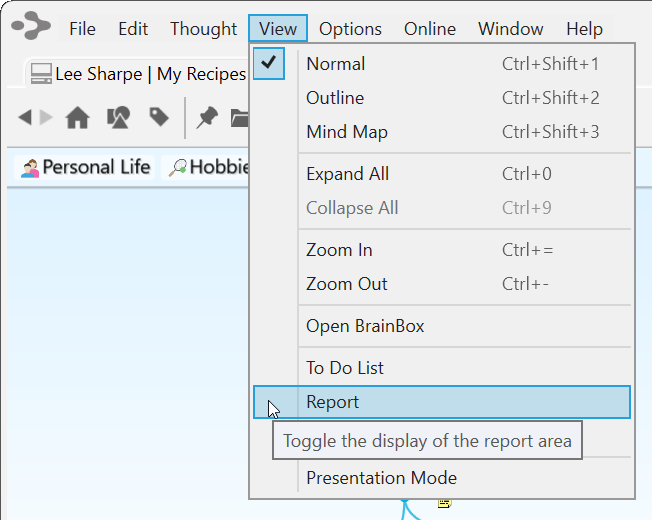
Figure 266. Viewing the Report Area
Selecting Report Criteria
The Thoughts drop-down list includes the following options and each selection provides additional criteria choices for fine-tuning your reports.
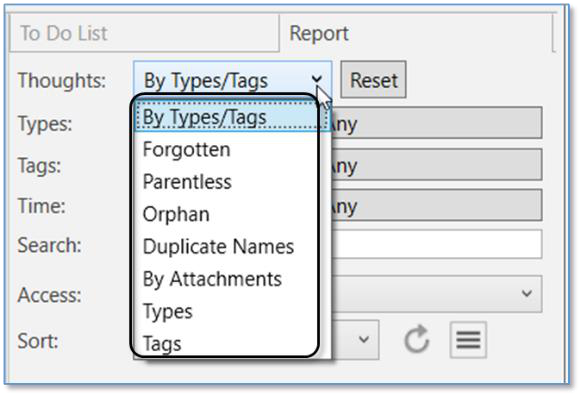
Figure 267. Thought Options for Reports You can run reports based on the criteria discussed below.
By Types/Tags
The By Types/Tags option in the Thoughts drop-down helps you filter thoughts in your Report by checking for specific thought Types and Tags for thoughts and/or for links. All thoughts or links that don’t meet the criteria will be excluded from the report. By default, thoughts of any Type will be included.
- Click the field to the right of Types (which will display “Any” if no Types have been selected yet), then select the check box for each thought Type to be included. Click outside of the list to close it.
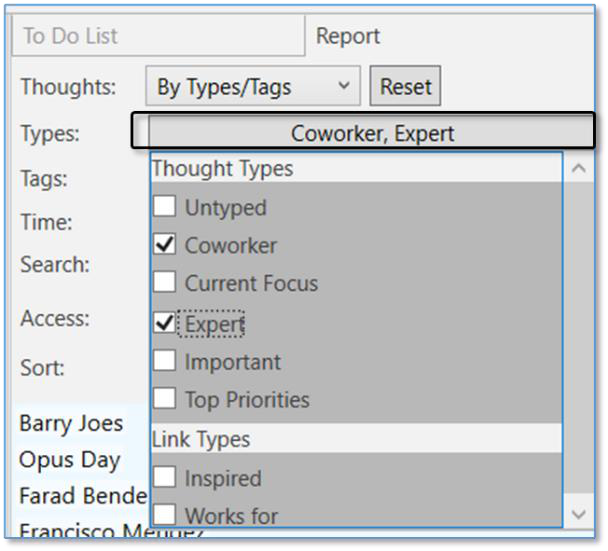
Figure 268. Selecting Thoughts by Types
Use the Tags field to filter thoughts based on your assigned Tags.
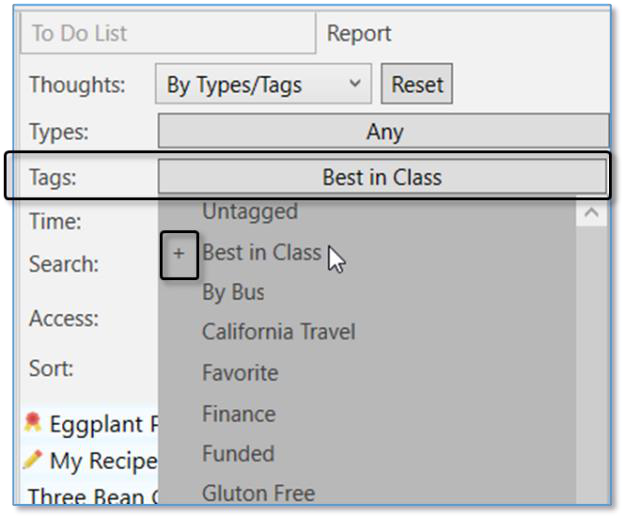
Figure 269. Filtering a Report by Tags
Clicking on a Tag in the list will add a “+” next to it, indicating that you want to list thoughts that have that Tag. Clicking the same Tag again will add a “-“ next to it.
This indicates that you do not want thoughts with that Tag listed. Clicking the same Tag once more will remove it from your list of filtered Tags.
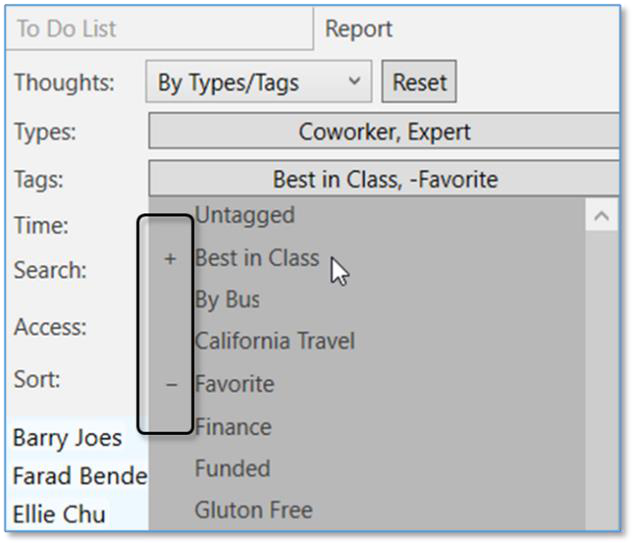
Figure 270. Filtering With and Without Tags
Use Types and Tags together in a report for some incredibly powerful thought filtering. When your report is displayed, you can click on any result to
immediately navigate to the thought.
Forgotten Thoughts
The Forgotten thoughts selection allows you to quickly view and access any thoughts you have forgotten in a brain.
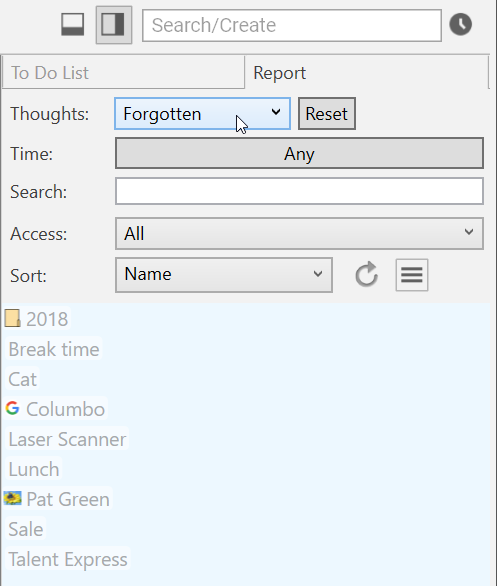
Figure 271. Forgotten Thoughts Report
With Forgotten selected in the Thoughts drop-down, you can use the menu button to add all forgotten thoughts in your report to your Selection, remove all forgotten thoughts in your report from your Selection, permanently delete all forgotten thoughts in your report, or remember all forgotten thoughts in your report.
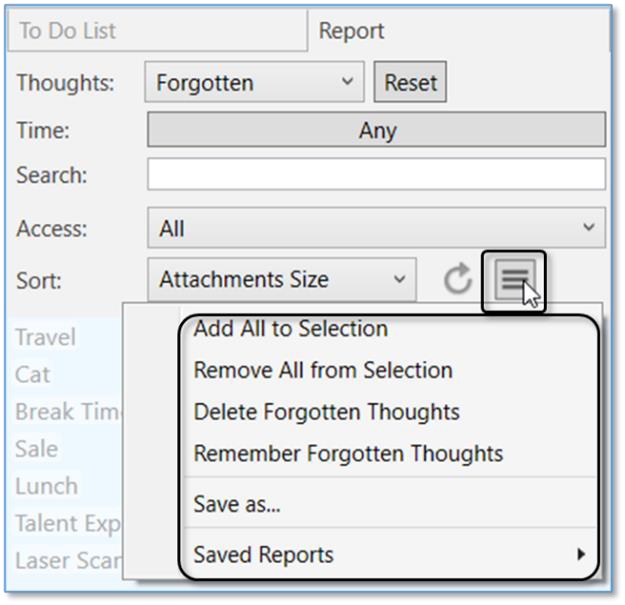
Figure 272. Choices for Forgotten Thoughts
As soon as you click any forgotten thought in the list, a “Showing Forgotten thoughts” message will display above the plex. Click any forgotten thought in the report to display that thought in the plex.
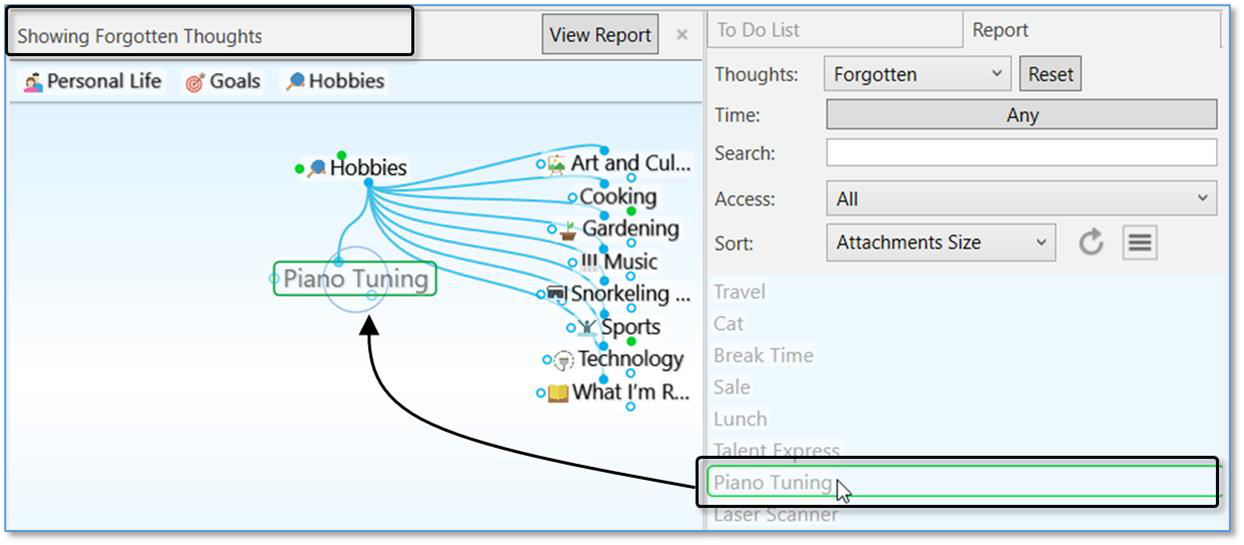
Figure 273. Showing Forgotten Thoughts
Parentless Thoughts
Select Parentless in the Thoughts drop-down to quickly view and access any thoughts that do not have a parent.
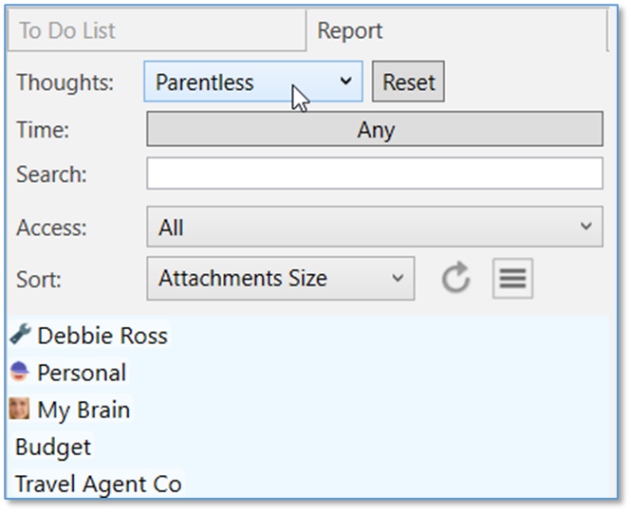
Figure 274. Parentless Thought Report
Viewing a Parentless Thought Report is great for tying up any loose connections or finding groups of disconnected "satellite thought clusters" in your brain for easy reconnection and clean-up.
Orphan thoughts will also appear in a Parentless Thought Report. Jump

thoughts (when they have no Parent) will frequently appear in this report as well.
Orphan Thoughts
Select Orphan in the Thoughts drop-down to quickly view and access any thoughts that do not have any other connections.

Figure 275. Orphan Thought Report
Viewing an Orphan Thought Report is an excellent way to find lost thoughts or thoughts that may have inadvertently been disconnected at some point. Is there a thought you know you had in your brain? Try running an Orphan Thought Report to see if it was previously unlinked by accident.
Duplicate Names
Select Duplicate Names in the Thoughts drop-down to quickly view and access multiple thoughts with the same name.
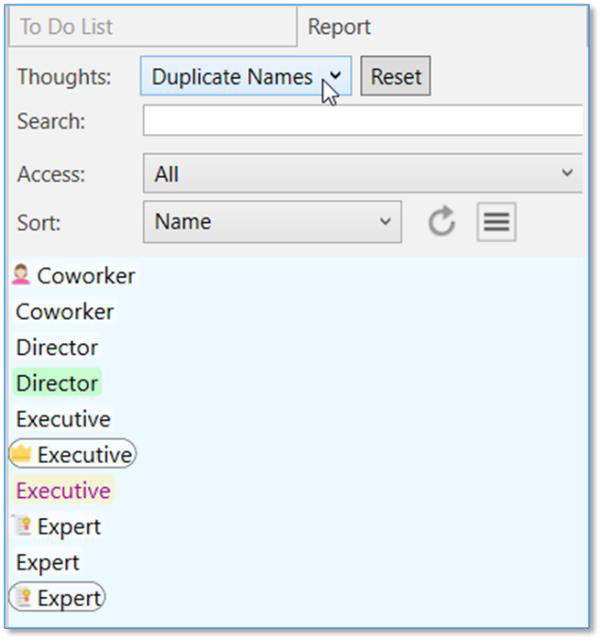
Figure 276. Duplicate Names Report
Viewing the Duplicate Thoughts Report can help you organize and manage your brain to make sure you are getting the most out of your information with quick access to the most important thoughts.
By Attachments
Select By Attachments in the Thoughts drop-down to quickly view and access all thoughts that have an attachment. By default, only internal attachments will be included and you can use the Type drop-down list to fine-tune as needed.
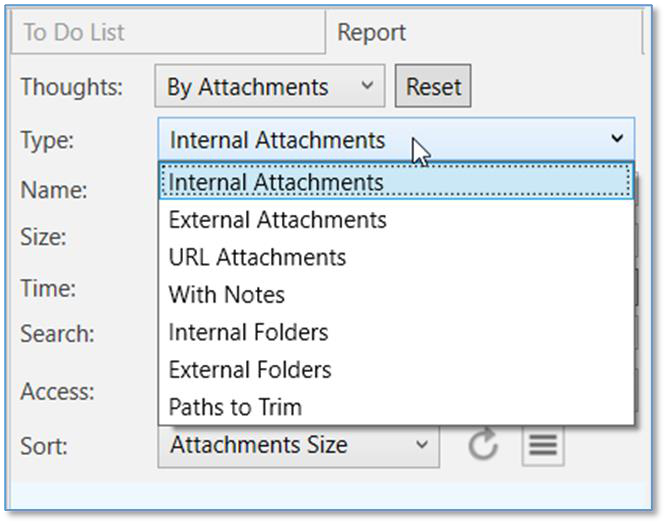
Figure 277. By Attachments Report
Filtering by Modification or Creation Date
All report options except Duplicate Names can be further narrowed down using
the Time drop-down selections. This is incredibly useful for finding information
modified within a specific date range and allows for even more in-depth reporting.
Figure 278. Filtering Thoughts in a Report by Modified Date
- Select Modified, Created, or Event to specify what the date range should
pertain to. For example, select Modified if you want to see thoughts you
made changes to within a specific period of time.
- Click in the first date field to display a calendar, then select a date; click in the
“to” date to select an end date.
- Additionally, you can click on the context menu button to select from a preset
list of date ranges:
o Last Day
o Last 2 Days
o Last 7 Days
o Last 14 Days
o Last 30 Days
- Select Any if you want to remove the time criteria.
Sorting Report Results
Use the Sort drop-down to switch the list order of your report results between
Name, Date Modified, and Attachment Size.
Reports sorted by Name will appear in ascending order, A-Z
Reports sorted by Date Modified will appear newest first
Reports sorted by Attachment Size will appear with the largest total
attachment sizes highest in the list
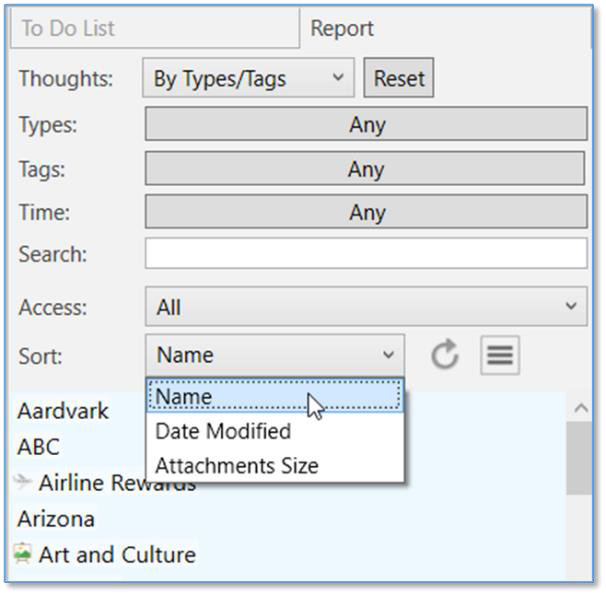
Figure 279. Sorting Thoughts in a Report
Refreshing or Resetting Report Results
- Click the Refresh button to update the list of thoughts that match your report
criteria.
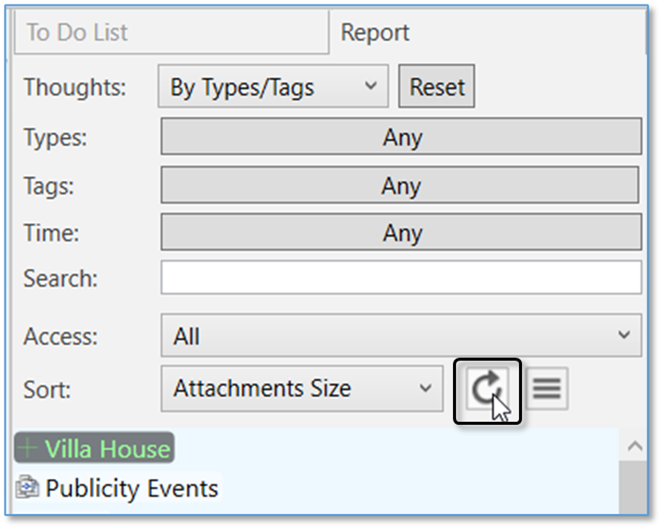
Figure 280. The Refresh Button
- Click the Reset button to clear all report criteria except the Thoughts field
and the Sort field selections.

Figure 281. The Reset Button
Adding Report Results to the Selection Panel
- Click the menu button, then click Add All to Selection. All report results will
be added to the Selection panel where you can apply actions to the thoughts
all at one time. Right-click in the Selection area to see your choices.
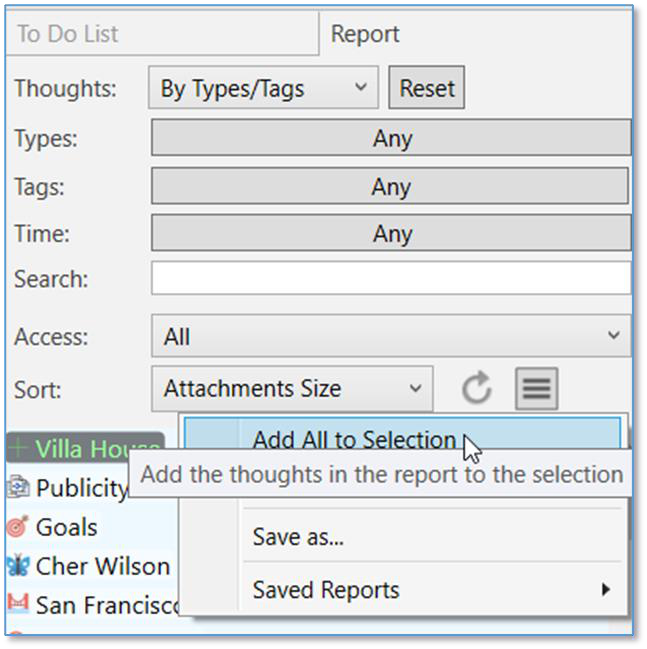
Figure 282. Adding Report Results to the Selection Panel
Saving and Accessing Reports
Reports can be saved and used again at any time.
To save a report:
Click the Save as command on the menu.
Type a name for your report, then click the OK button.

Figure 283. Saving a Report To open a saved report:
Click the Saved Reports command on the menu.
Click the name of the report you want to open.
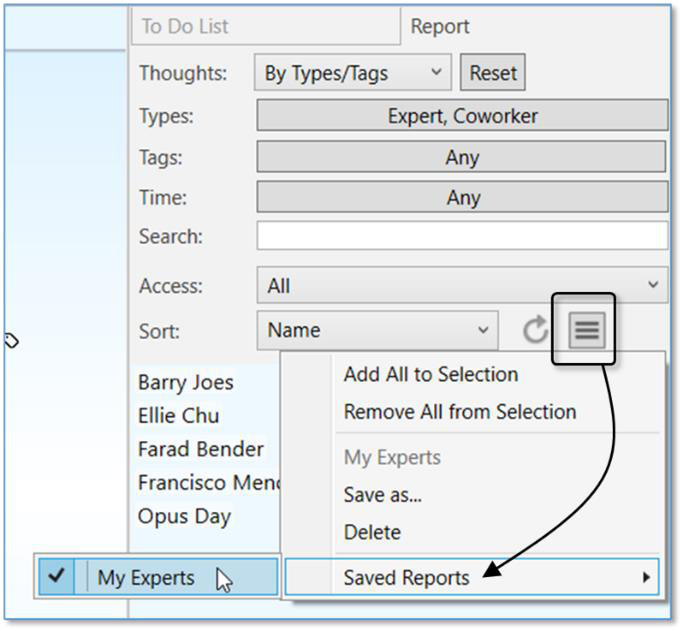
Figure 284. Saving a Report
Viewing a List of Recent Changes
You can view a quick report of all changes you’ve made recently to thoughts.
Your thought modifications are now logged and instantly viewable in a chronological display of the previous 1,000 created and modified thoughts.
Modifications can include:
Renaming
Editing, adding or deleting attachments
Any edit to the thought notes
Renaming
Linking or unlinking to another thought
To view your recently modified thoughts, simply click on the clock icon to the right of the Search box. Modified thoughts will be displayed starting with the current date. When you hover over a thought, a comprehensive, time-stamped report of the exact modification(s) appear in a pop-up next to the name.
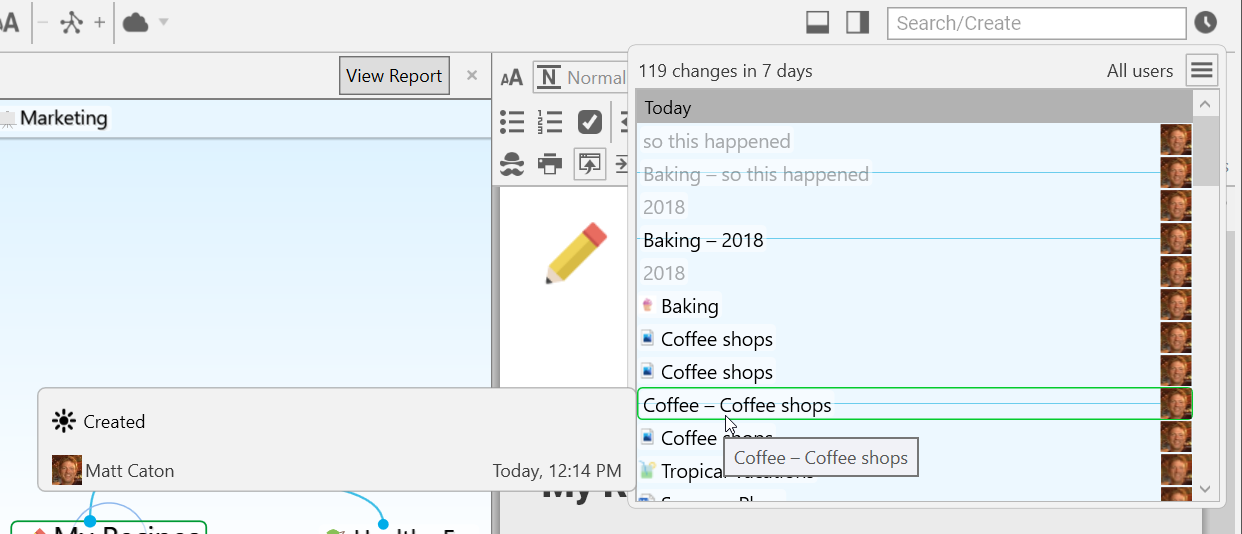
Figure 285. Recently Modified Thoughts and Links