Editing Thoughts and Links
Renaming Thoughts
You can easily rename any thought in its Thought Properties dialog box. When you rename a thought, any references to it from other notes are automatically updated with the new name.
- Click the thought to make it active, then click it again. You may also click the Show Thought Properties command in the Thought menu or Alt-click a
non-active thought. In the Thought Properties dialog box, make any edits you want, then press the Enter key or click in the plex.
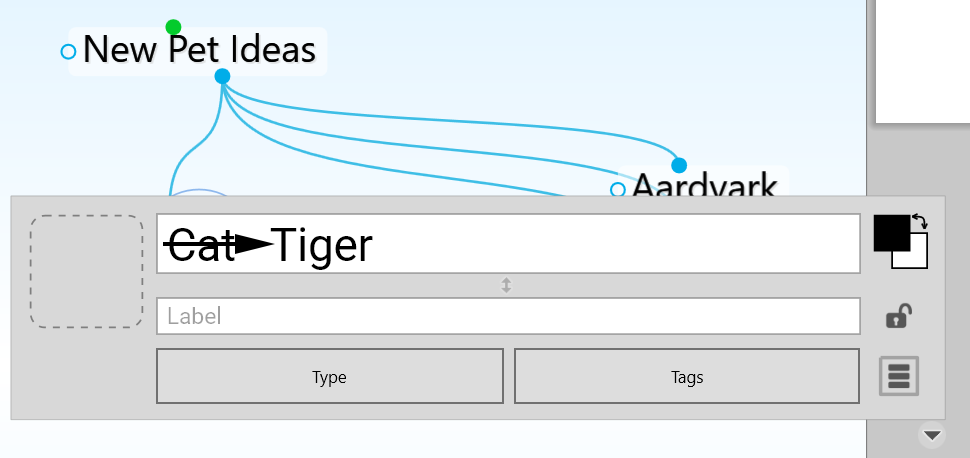
Figure 106. Renaming a Thought
Selecting Multiple Thoughts
You can select multiple thoughts in three ways:
Hold down the Ctrl key (Cmd on macOS) as you click each thought you want to select, or
Hold down the Ctrl key (Cmd on macOS) as you drag to form a box around the thoughts, or
Hold down the Ctrl key (Cmd on macOS) as you click a gate to select all the thoughts connected to that gate
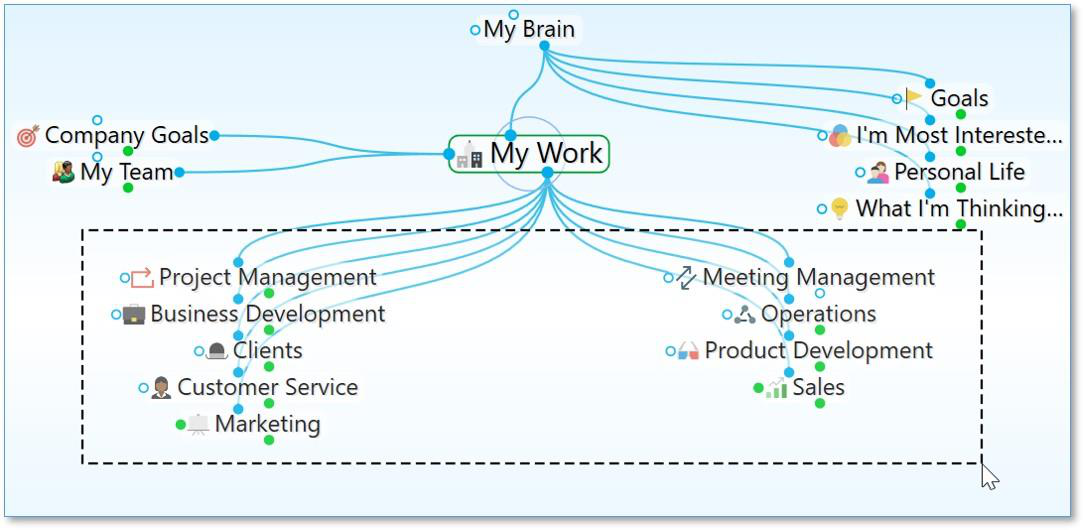
Figure 107. Selecting Multiple Thoughts by Ctrl-Dragging (Cmd-dragging on macOS)

Selected thoughts are then added to TheBrain’s Selection panel for making mass edits on large groups of thoughts at one time.
After the multiple thoughts are selected, you can apply actions—link, unlink, forget, set thought type, and other actions you would apply to an individual thought—to the selected thoughts en masse. When multiple thoughts are selected, they are listed in a Selection panel on the left side of the plex and they are highlighted in the plex itself.
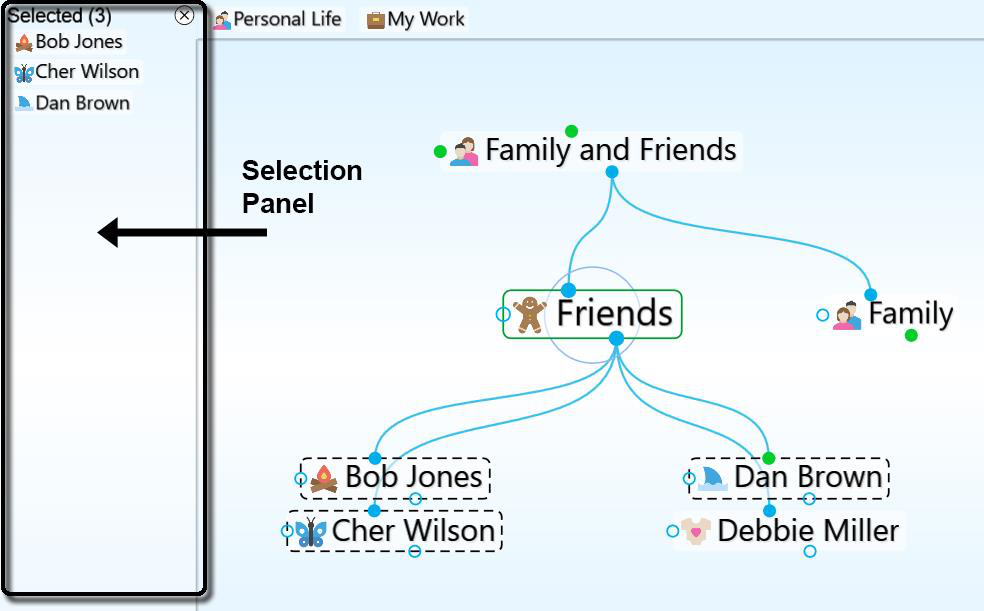
Figure 108. Selection Panel and Selected Thoughts
To de-select individual thoughts:
- Hold down the Ctrl key (Cmd on macOS) as you click a thought (either in the plex or in the Selection panel) to de-select just that thought.
To close the Selection panel and de-select all thoughts:
- Click the Close button (X) in the top-right corner of the Selection panel. The button will turn red as you point to it and after the panel is closed the thoughts will no longer be selected in the plex.
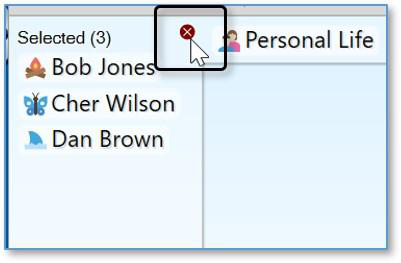
Figure 109. Closing the Selection Panel
To perform actions on selected thoughts:
- Right-click in an empty area of the Selection panel and select the action of your choice on the context menu. The entries in this menu are also displayed in the Edit menu.
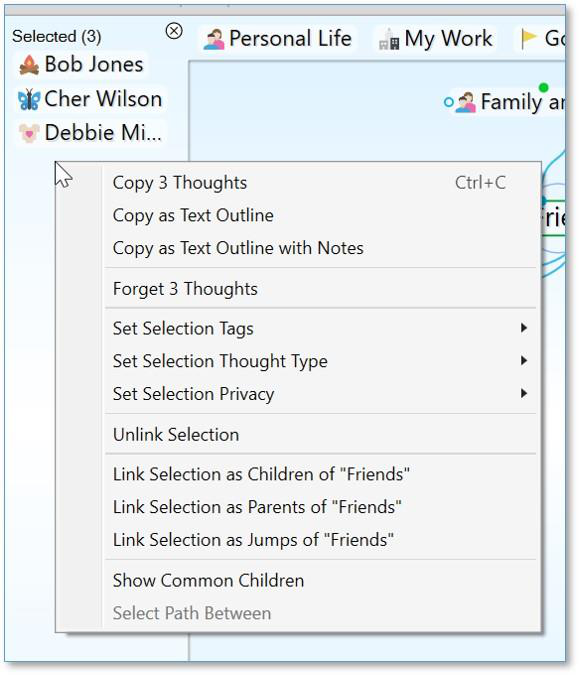
Figure 110. Selection Panel Context Menu
Other Selection Uses
Once you have created a selection, you can also use it for other things besides what you see in the menu. For example, you can limit searches to selected thoughts. In the example below, only “Debbie Miller” is found because it is the only thought name beginning with “D” that is currently selected.
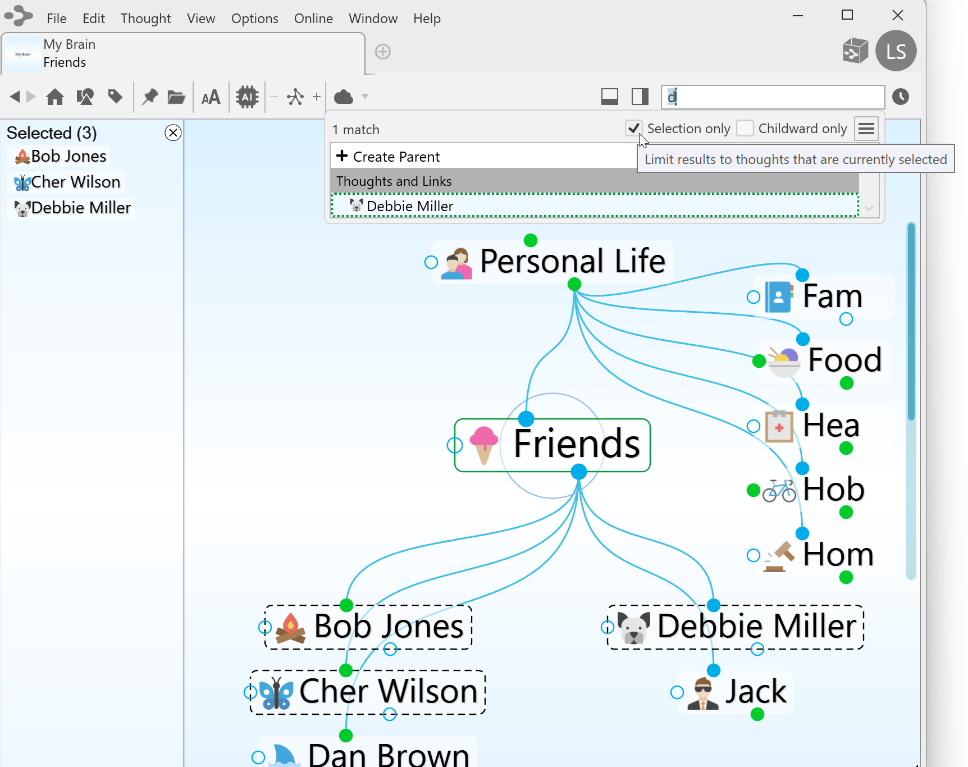
Figure 111. Limiting Searches to Selected Thoughts
Forgetting and Deleting Thoughts
When you no longer need a thought, it can be forgotten or deleted. A forgotten thought may be remembered and restored later, or deleted. A deleted thought is gone forever. This is similar to the Recycle Bin/Trash feature on your desktop which stores your deleted files until you choose to remove them permanently.
To forget a thought:
Right-click the thought to be forgotten, then click Forget Thought Name in the context menu, or
Click the active thought to be forgotten, click the menu button in the Thought Properties dialog box, then, click the Forget Thought Name command.
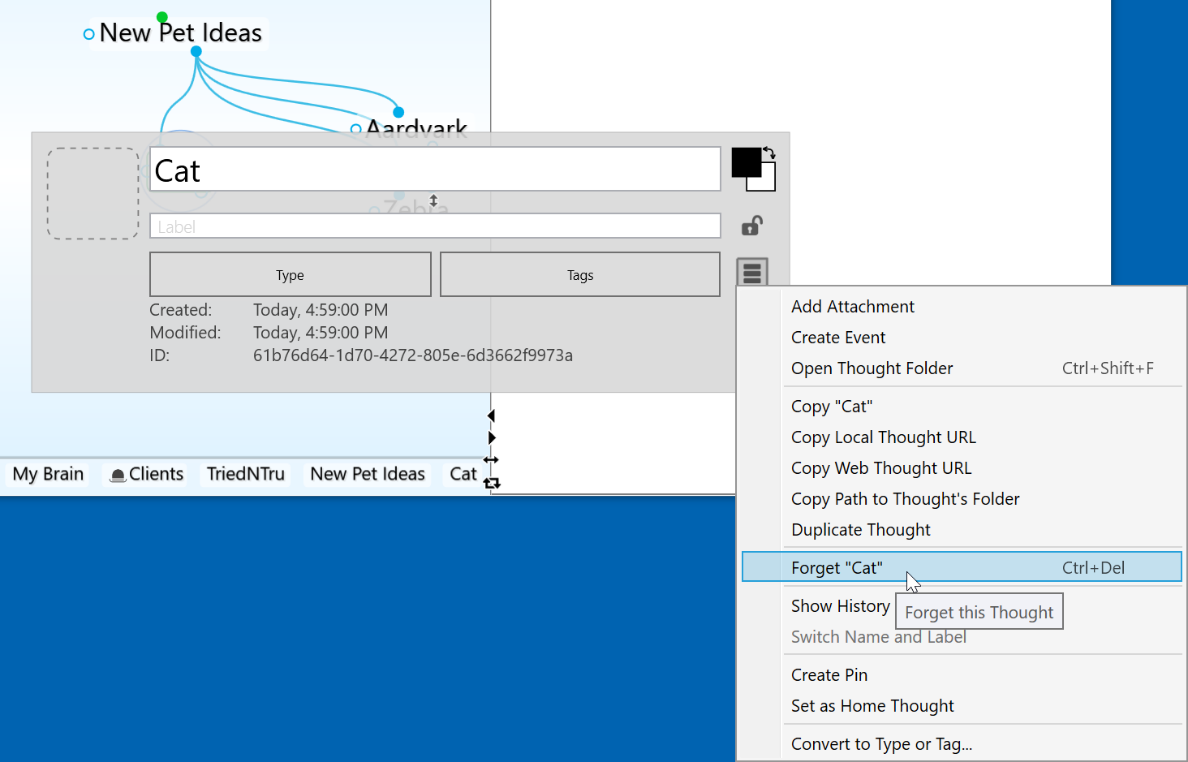
Figure 112. Forgetting a Thought in its Thought Properties Dialog Box
Once a thought has been forgotten it will disappear from the display. If you want to access it again later temporarily, you can do so by turning on the display of forgotten thoughts. You can also permanently delete forgotten thoughts or you can remember them.
To access forgotten thoughts:
- Click the Options menu, then click the ShowForgotten Thoughts command. Any forgotten thoughts will appear grayed out in the plex.
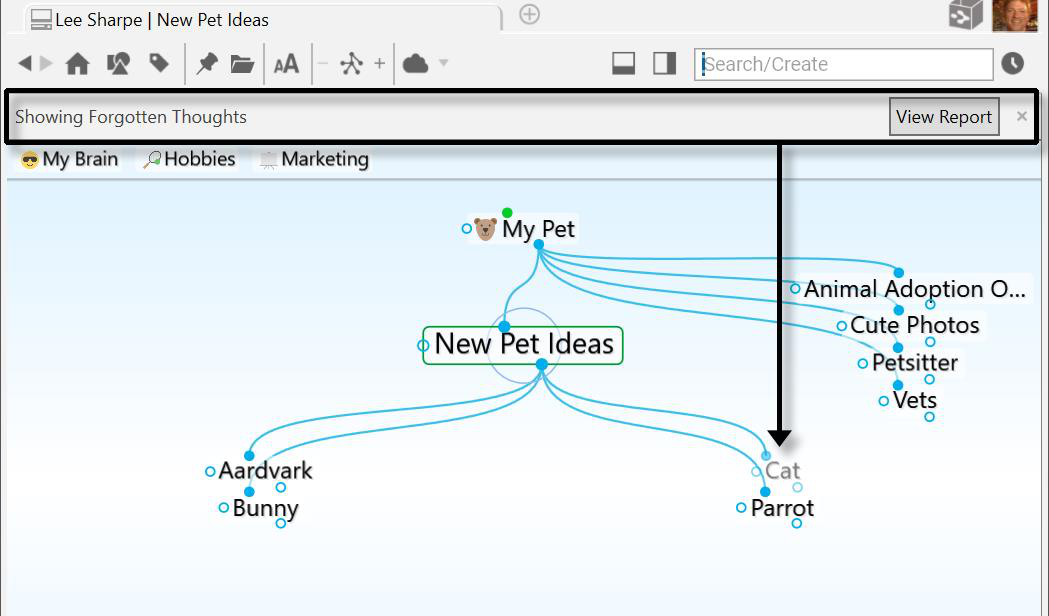
Figure 113. Forgotten Thoughts in the Plex
- Notice the “Showing Forgotten Thoughts” message above the pins. This reminds you why some thoughts are grayed. You can use forgotten thoughts just like normal thoughts as long as they are displayed. Click the View Report button to work directly with the forgotten thoughts.
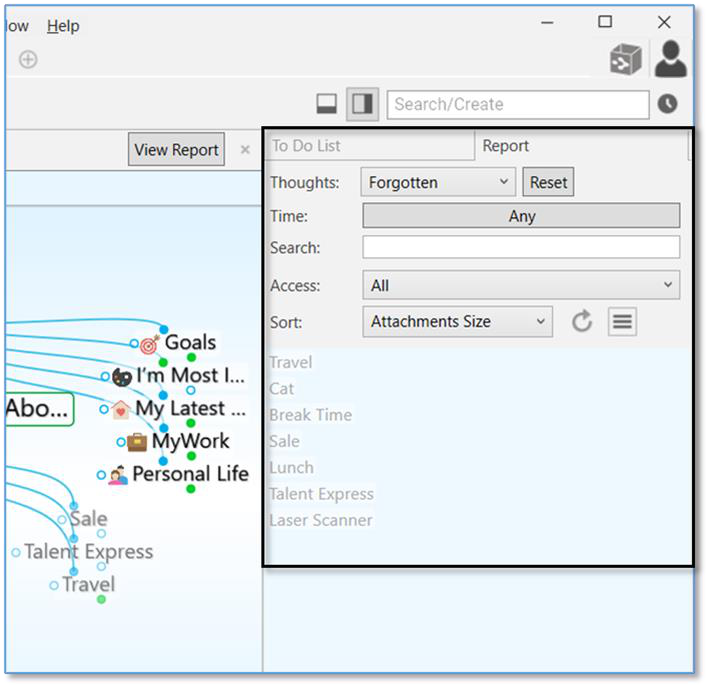
Figure 114. Forgotten Thoughts in the Report Tab
- You can click on a thought in the Reports tab to activate it.
To delete all forgotten thoughts using the Reports tab:
- Click the Reports tab menu button, then select Forgotten from the Thoughts drop down menu. You can then click on the context menu button and select Delete Forgotten Thoughts. Alternatively, you can use the Ctrl key (Cmd on macOS) to select multiple individual forgotten thoughts and then delete only those.
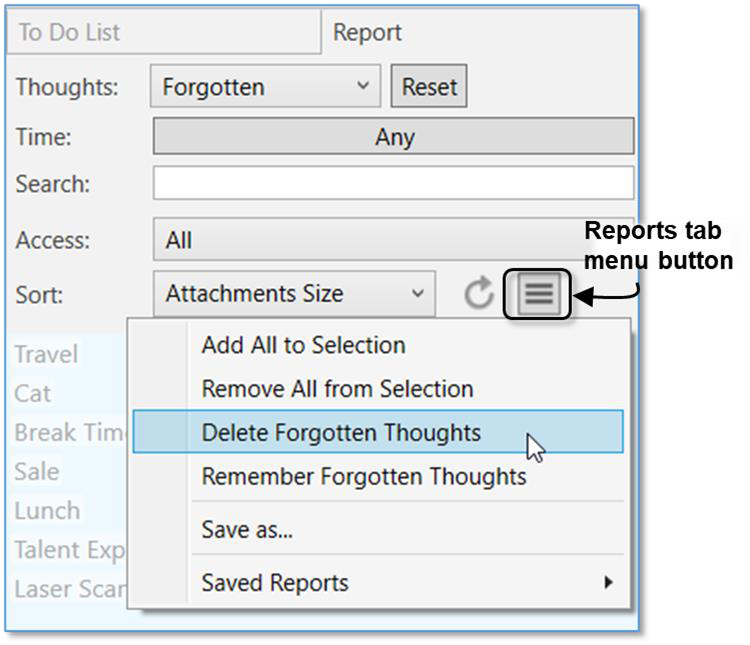
Figure 115. Using the Report Tab to Delete All Forgotten Thoughts
- You can click the Refresh button on the Reports tab to update the list.
Closing the Forgotten Thoughts dialog box hides the forgotten thoughts. You can also reinstate forgotten thoughts by clicking the Remember All command
in the
Reports
tab menu. You can also reinstate an individual forgotten thought by right-clicking in the plex, then clicking the Remember
thought name
command on the context menu.
It is generally recommended to forget thoughts when you don’t need them so that you can easily retrieve them if you change your mind. If you are sure you will never need a thought again and you do not want to be able to remember it in the future, you can delete it immediately without forgetting it first.
To delete a thought instantly:
- Hold down the Shift key (for Windows)/Alt key (for Mac) as you right-click the thought to be deleted. The context menu will be displayed, showing the Delete thought name command in place of the Forget thought name command.
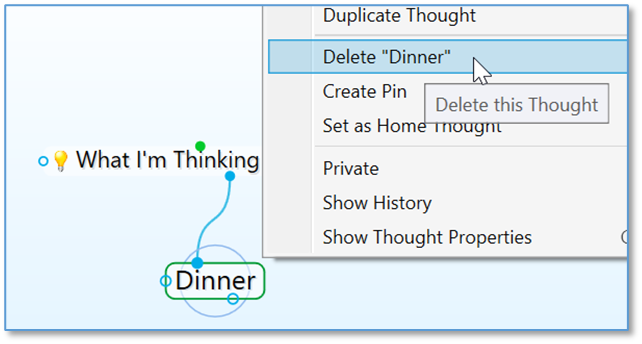
Figure 116. Shift-Right-Click Context Menu for a Thought
- Click the Deletethought name command. The thought will be permanently deleted. See Selecting Multiple Thoughts on page 97 for forgetting or
deleting multiple thoughts at once.
When a file attachment is deleted, the file is placed into an internal trash folder
in case the delete needs to be undone. When undo is cleared, the trash is emptied. The files are then moved to the OS trash/recycle bin so you have further opportunity to recover the file if needed.

Tip:
If you delete something by accident you can still recover it if you use the
Undo
command immediately.
Unlinking Thoughts
To unlink thoughts:
- Right-click the link, then click the Unlink command on the context menu
Tip:
If you are moving a thought from one place to another by linking and unlinking it, it is generally easier to do the unlinking after you have done the linking. This avoids making the thought into an “orphan,” a thought with no relatives.
If you have difficulty telling which link you are pointing at with the mouse, just look at the highlighted thoughts. When the mouse pointer is over a link, it is highlighted along with the two thoughts it connects. This makes it easy to tell which thoughts will be unlinked if you click on the link.
In addition to being able to unlink thoughts one link at a time, you can also select multiple thoughts to unlink several of them at once. To do so:
Select the thoughts you want to unlink by holding down the Ctrl key (Cmd on macOS) and clicking on each one, or Ctrl drag (Cmd drag on macOS) a box around thoughts in the same area
Activate the thought from which you wish to unlink the selected thoughts
Right-click in the Selection panel and select the Unlink Selection command
Linking Thoughts
As noted previously, links are power. Not only do links allow for associations that group thoughts conceptually, they allow information to be stored in and
accessible from numerous places.
A single thought may have relationships with multiple thoughts. For example, you may want a thought named “Aunt Mary” to be a child of your “Mentors”
thought and also a child of your “Family” thought. If your Aunt Mary is also helping you plan your next vacation, her thought may also be a child or jump thought to your “Vacation” thought. The possibilities are endless.
There are several ways to link to existing thoughts, as described in the following sections.
Link to a Thought Visible in the Plex
When the thoughts you want to link are both visible in the plex, you can simply drag from the desired gate of one thought in the plex to another thought in the plex. Note that the thought you drag from or to does not have to be the active thought.
In the Normal view, the display of thoughts is limited to close relations. You may find it useful to expand the view when linking thoughts, because you can see more thoughts at once.
Link by Dragging to a Pin
You can Link to a thought that is not visible in the plex if it has a pin. Simply drag from the appropriate gate to the pin. When you want to link a thought to many other thoughts, create a pin of the thought so you can quickly link to it. A pin’s gates appear when you point at the pin with the mouse.
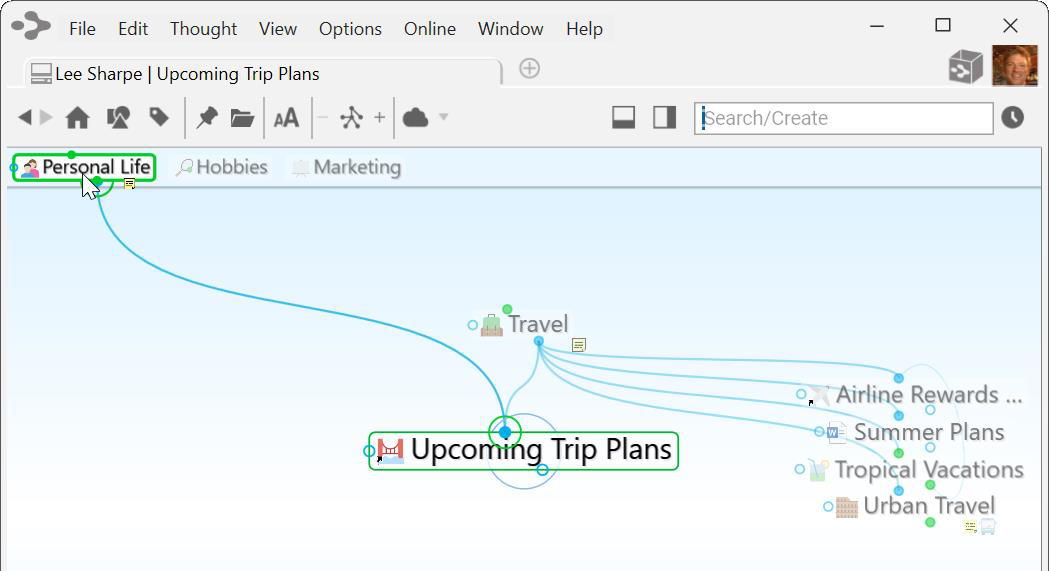
Figure 117. Link by Dragging to a Pin
The relationship you establish by linking a thought to a pin is between the thoughts; if you delete the pin, the Link between the thoughts is still intact.
Link by Dragging to the Past Thoughts’ List
You can link a thought in the plex to a thought in the Past Thought List. Like pins, gates for a thought in the Past Thought List appear when you point at the past thought with the mouse.
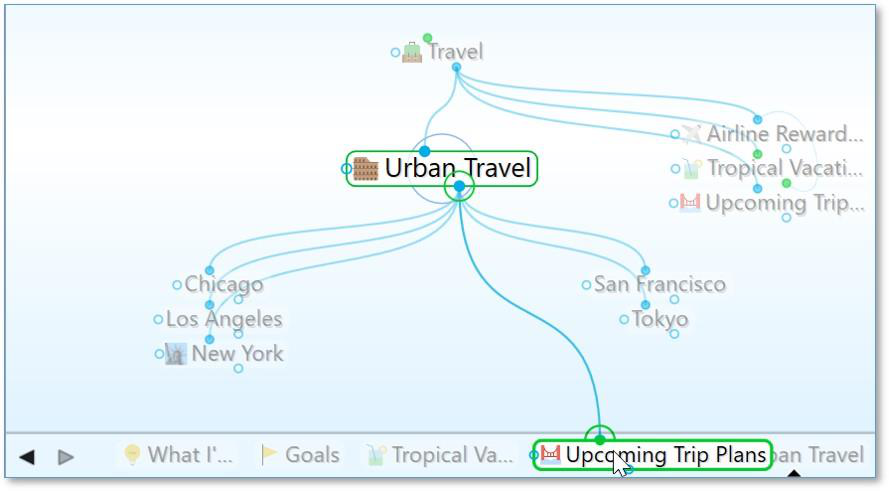
Figure 118. Link by Dragging to a Thought in the Past Thoughts’ List
Link by Selecting a Thought in the Existing Thoughts List
You can also link by using the Thought Creation dialog box:
Make the thought you want to link from the active thought, then start creating a thought by dragging or using the Thought menu. The Thought Creation dialog box appears.
Type the first few letters of the name of the thought you want to link to. Double-click on the thought you want to link when you see it in the Existing Thought List that appears below (or click it once, then click in the thought name field and press the Enter key).
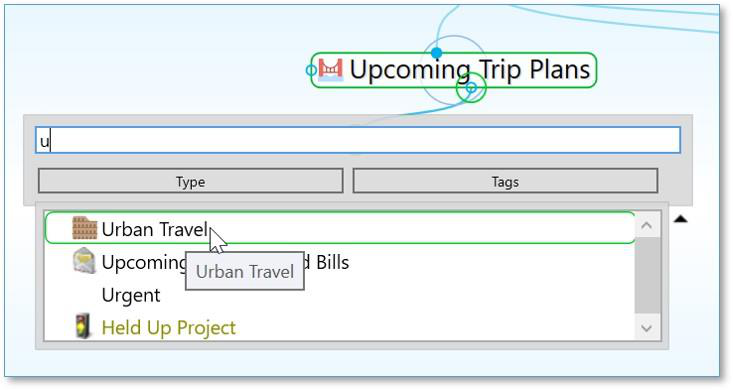
Figure 119. Create a Link by Starting to Create a Child Thought
Link by Using the Selection Panel
Thoughts in the Selection panel can be linked to the active thought using the Selection menu:
Select the thought or thoughts you want to link using Ctrl-click (Cmd on macOS) or by holding down the Ctrl key (Cmd on macOS) as you drag a box around the thoughts if they’re next to each other.
Activate the thought in the plex to which you want to link.
Right-click the Selection panel, then click the link command of your choice in the context menu.
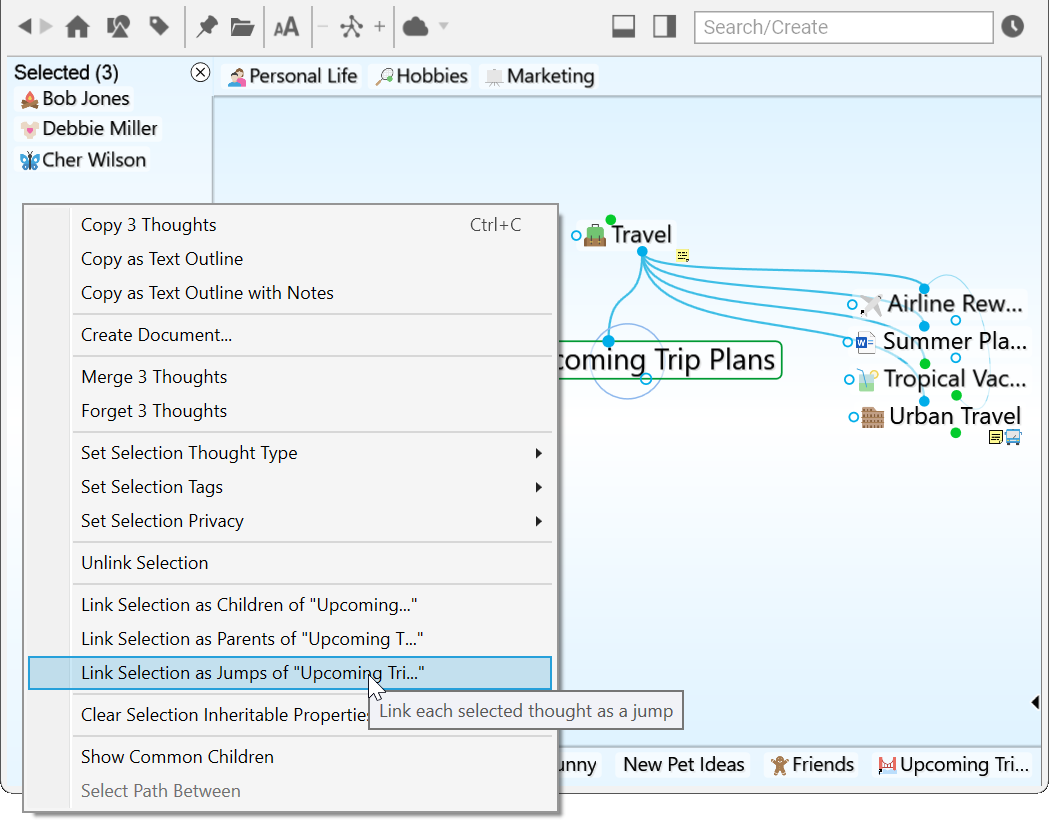
Figure 120. Linking Using the Selection Panel
Cancel Creation of a Link
Press the Esc key while dragging a link to abort the process. (The mouse button should still be held down while you press Esc.)
Changing Relationships Using Drag and Drop
Say that you decide that your “Product Promotions” thought shouldn’t really be a child of your “Customer Service” thought. Instead, it should be the child of “Business Development.” You can quickly change relationships between thoughts in a single step: Hold down the Shift key while linking a thought to a new parent. All of the current parents will be unlinked automatically. Note that even if a thought has more than one parent, all of the former parents will be unlinked.
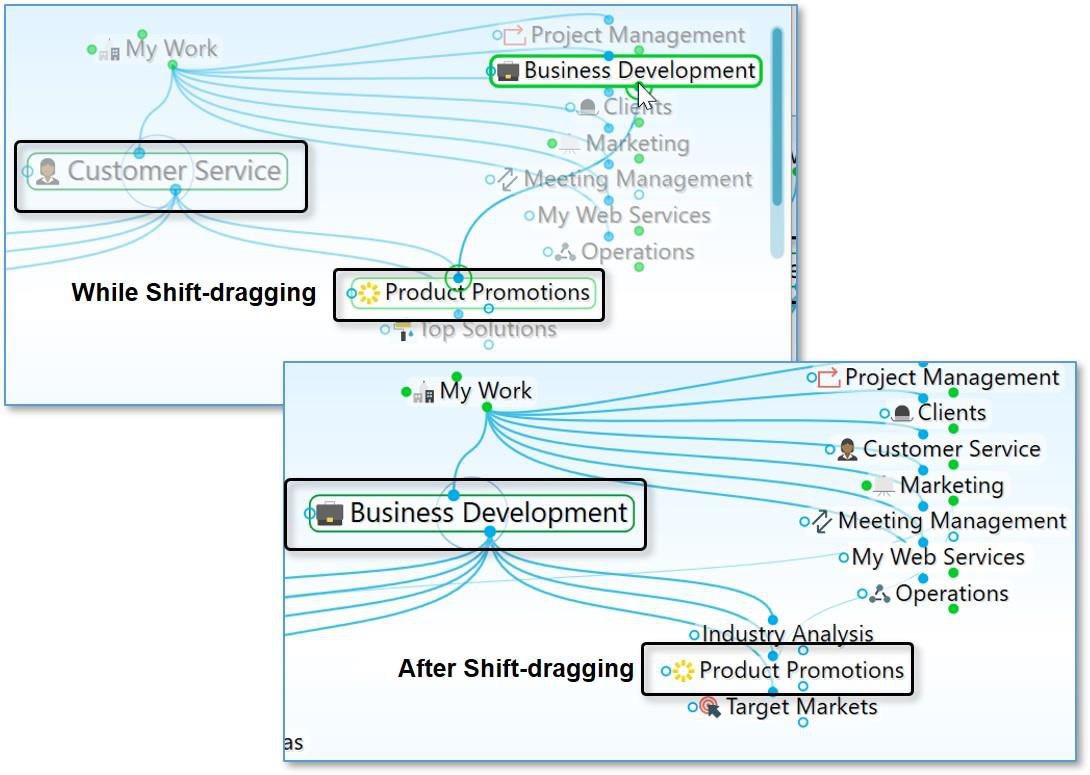
Figure 121. Shift-Dragging to Change Relationships