Managing Events

Your brain has its own built-in Calendar. You can access it from the content area or the Timeline View to add and modify events and integrate them with your thoughts. You can view your Calendar a day, week, month, or year at a time.
TheBrain also has several different ways to assist you with managing your time, so you’ll know when events are taking place, when content was edited and when projects are due.
Creating an Event
You can create a new event from the content area or from the Timeline. Both methods give you full access to all event settings. Events support spellcheck and markdown formatting in their descriptions.
Creating an Event from the Content Area
Select the thought with which the new event will be associated.
Click the Attachment button in the content area toolbar, then click Create Event.

Events created from the content area are automatically associated with the active thought, but you can easily detach them.

Figure 287. Creating a New Event in the Content Area
Use the event editor pop-up to enter details about the event. By default, the name of the event is the name of the active thought.
As shown below, you can specify start and stop times and dates and add a label, description, and location in the event editor pop-up. You can make the event recurring and set up a reminder. You can also color code an event—so that all events of a specific type (personal, marketing, finance, etc.) will appear in your Timeline view in an identifiable color. Event will inherit from colors from
associated thoughts.
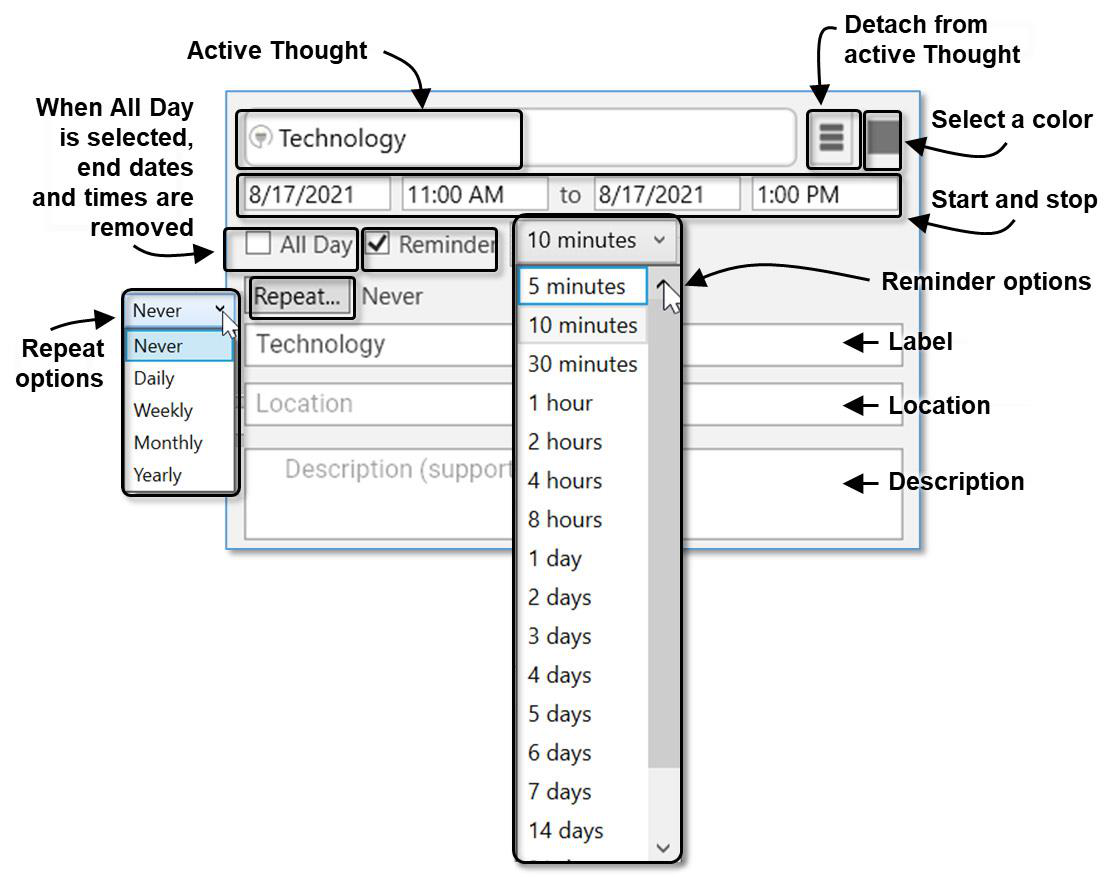
Figure 288. The Event Editor
Creating an Event from the Timeline
- Unless it is already open, display the Timeline by clicking the Timeline command in the View menu or the Timeline button to the left of the Search box.

Figure 289. Launching TheBrain Timeline
- Drag on the time ruler at the bottom to select the start and stop times of the event. After you finish dragging, the event editor will be displayed. By default, this will be a standalone event, not associated with the current active thought. You can easily attach it to the active thought by clicking Attach to “active thought” in the event editor menu.
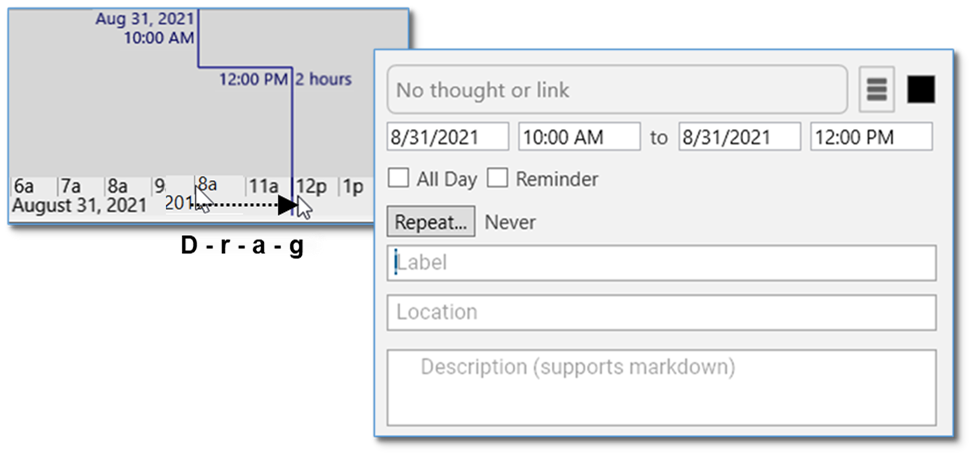
Figure 290. Click and Drag to Create a New Event
Please see the Navigating in Timeline View section on page 235 for
information about using the Timeline and 1-click fine-tuning based on your preferences.
Responding to Event Reminders
Reminders appear when the brain containing the event is open.
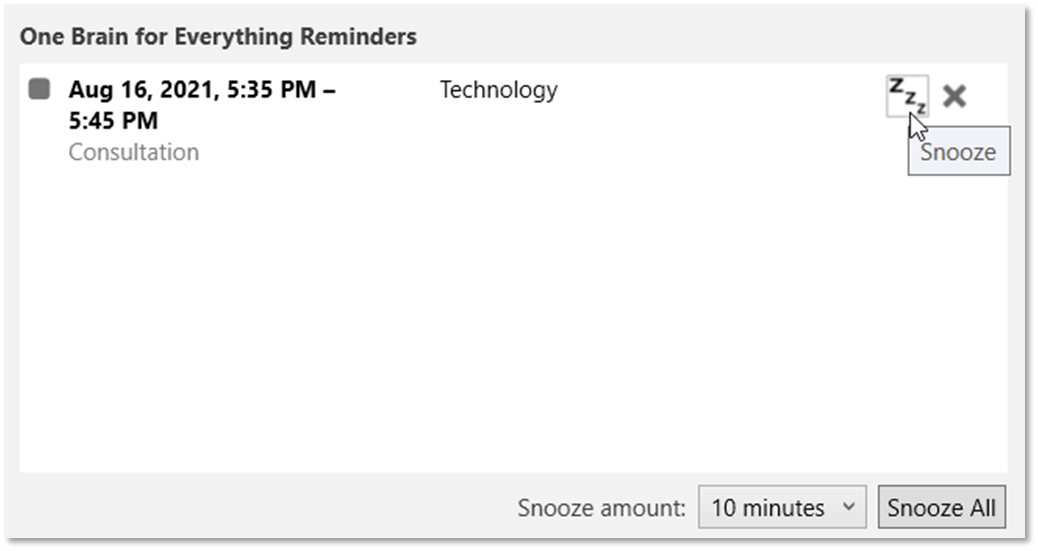
Figure 291. TheBrain’s Event Reminder Pop-Up
From the Reminder window, you can snooze for a designated amount of time or
dismiss the reminder. Dismissing the reminder does not delete the event in your
timeline.
Editing and Deleting Events
To edit or delete an event from the Content Area:
- In the content area for the Thought associated with the event, right-click the
event you want to work with, then choose a command from the context menu.
Choose Properties to edit the details of the event.
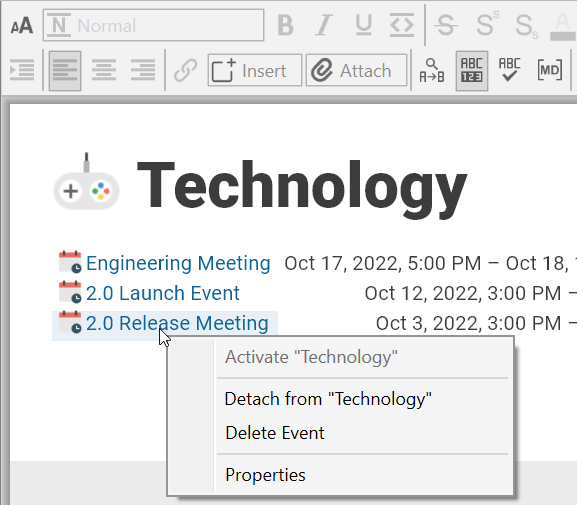
Figure 292. Editing and Deleting Events in the Content Area
To edit or delete an event from the Timeline:
To edit, click the event to open the event editor pop-up.
To delete, right-click the event on the Timeline, then click Delete Event. You can also delete the event by selecting Delete Event in the event editor pop- up.
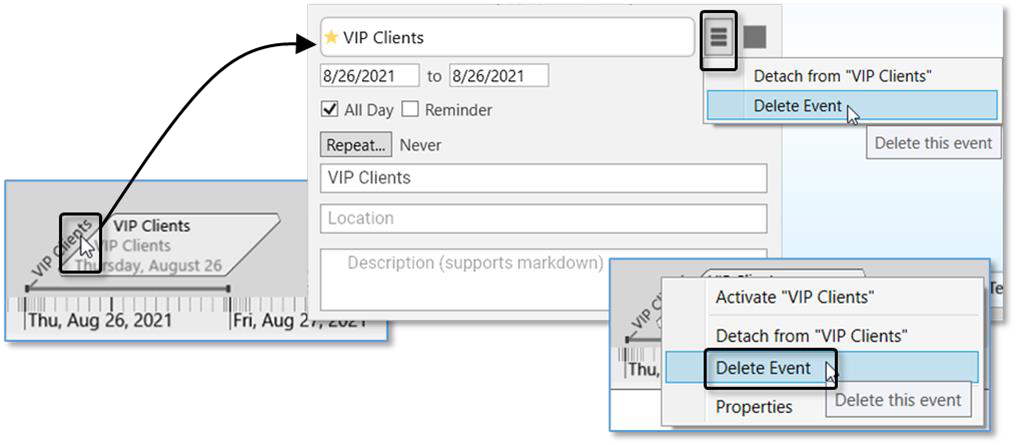
Figure 293. Editing and Deleting an Event in the Timeline
Navigating in Timeline View
- Drag in the background of the timeline up and down to zoom in and out.
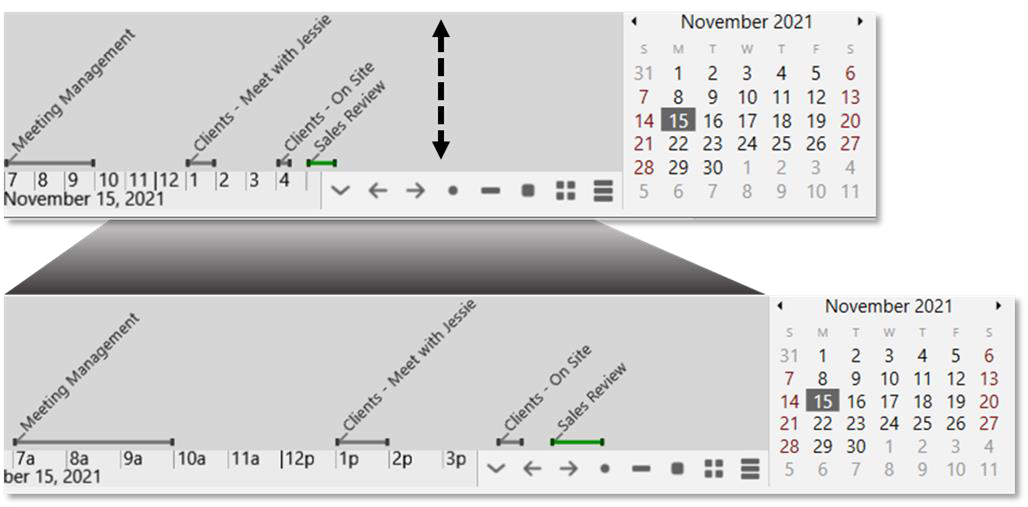
Figure 294. Click and Drag Up and Down to Zoom - Drag left and right to scroll through time.
- Buttons allow you to switch between day, week, month and year view. Or, navigate to a specific day in the mini calendar.
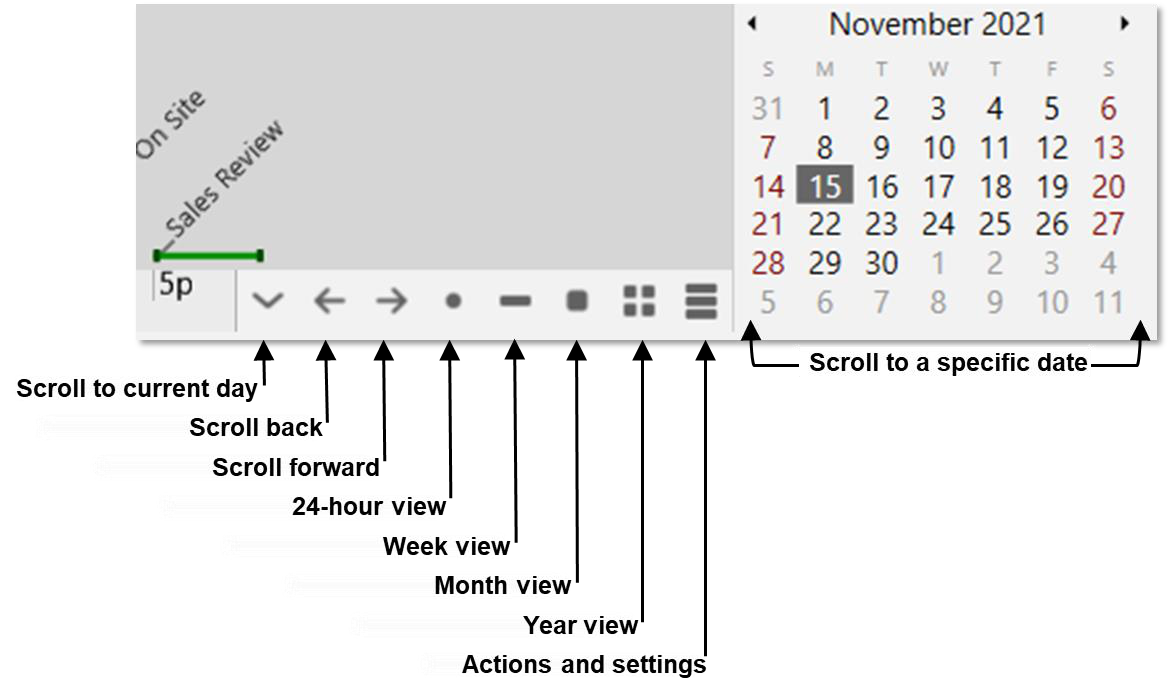
Figure 295. TheBrain Timeline Buttons
Events associated with Forgotten Thoughts will only appear in the timeline if
Forgotten Thoughts are being viewed in the plex. Like the faded display in the plex, the thought’s event will also appear as faded text.